|
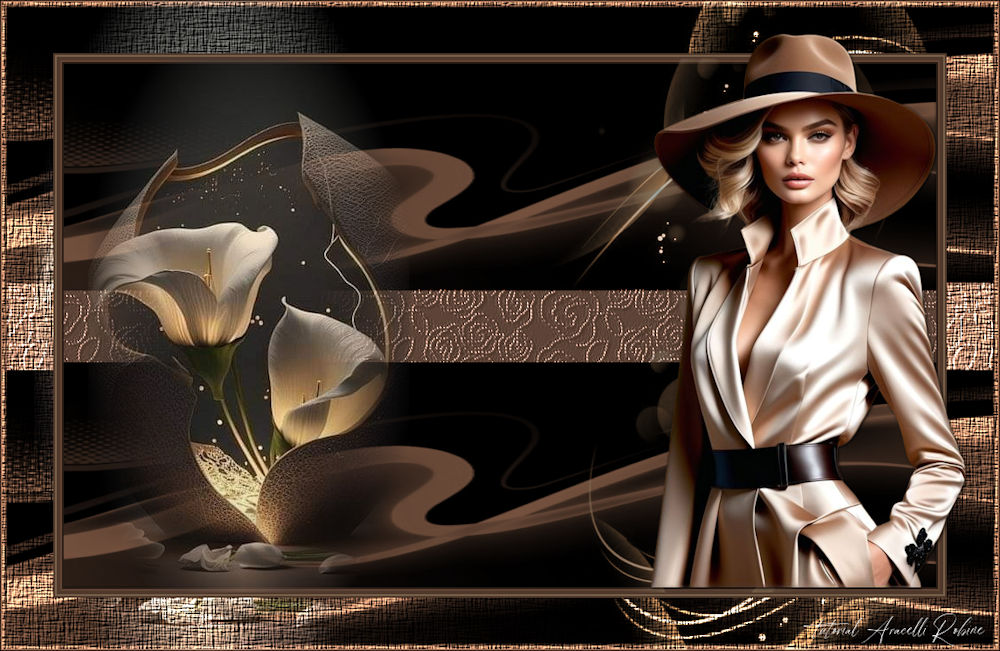
Elegansie
TRADUÇÕES

MATERIAL
Tube feminino (minha autoria)
Misted: Misted flor Elegansie (minha autoria)
Misted: misted abstrato elegansie 2 (minha autoria)
Mask: nminas_masks_88 (Naise — agradeço)
Textura: flores artdeco — salve na pasta Textures do seu PSP
Seleções: #selecao-Arar01, #selecao-Arar02, #selecao-Arar03 — salve na pasta Selections do seu PSP
Cores usadas:
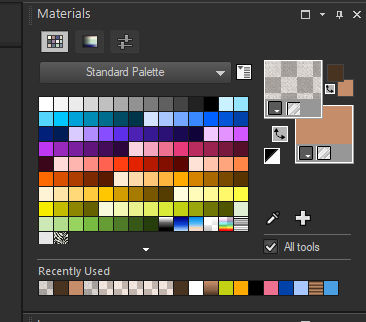
Foreground: #483321
Background: #c58d6a
PSP 2020 usado neste tutorial.
PLUGINS
Nenhum.
TUTORIAL
|
Use a seta para marcar a sua linha
Clique no mouse para movê-la
|
|
1_.
Abra uma imagem transparente de 1000 x 600 px.
2_.
Pinte a imagem com a cor do Foreground #483321.
3_.
Layers → New Raster Layer.
4_.
Selections → Load/Save Selection → Load Selection From Disk: #selecao-Arar01.
5_.
Feche a visibilidade da Raster 1.
6_.
Pinte a seleção com a cor do Foreground.
7_.
Em Foreground and Stroke Properties, ajuste para Texture, como na imagem:
8_.
Mude a cor do Foreground para a cor do Background.
9_.
Aplique a textura flores artdeco 3 vezes.
10_.
Selections → Select None.
11_.
Volte a deixar a Raster 1 visível.
12_.
Layers → Merge → Merge Down.
13_.
Layers → New Raster Layer.
14_.
Selections → Load/Save Selection → Load Selection From Disk: #selecao-Arar02.
15_.
Abra a mask no PSP.
16_.
Edit → Copy na mask.
Edit → Paste Into Selection.
17_.
Selections → Select None.
18_.
Layers → Properties → Blend Mode: Overlay.
19_.
Layers → New Raster Layer.
20_.
Selections → Load/Save Selection → Load Selection From Disk: #selecao-Arar03.
21_.
Edit → Copy na mask novamente.
22_.
Edit → Paste Into Selection.
23_.
Layers → Properties → Blend Mode: Overlay.
24_.
Selections → Select None.
25_.
Layers → Merge → Merge Visible.
26_.
Image → Add Borders, Symmetric marcado:
2 px na cor escura
2 px na cor clara
2 px na cor escura
27_.
Edit → Copy no Misted flor Elegansie.
Edit → Paste As New Layer e posicione à esquerda.
28_.
Edit → Copy no misted abstrato elegansie 2.
Edit → Paste As New Layer e posicione à direita.
29_.
Layers → Properties → Blend Mode: Exclusion.
30_.
Layers → Merge → Merge Visible.
31_.
Edit → Copy.
32_.
Image → Add Borders, Symmetric marcado: 50 px na cor #ffffff (branca).
33_.
Com a ferramenta Magic Wand (Tolerance e Feather em 0), clique nessa borda branca.
34_.
Edit → Paste Into Selection.
35_.
Effects → Texture Effects → Texture:
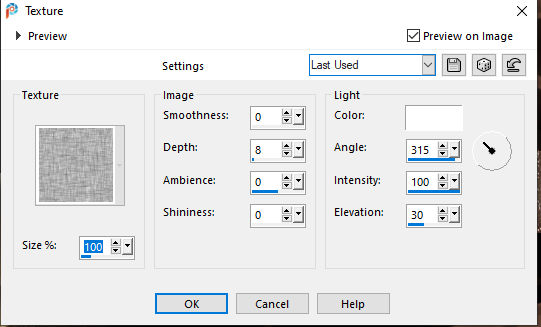
36_.
Selections → Select None.
37_.
Image → Add Borders, Symmetric marcado: 1 px na cor preta.
38_.
Edit → Copy no seu tube principal.
Edit → Paste As New Layer e posicione onde desejar.
39_.
Assine.
40_.
Salve em JPG.
Aracelli Robine, 13/05/2024.
Bombinhas - SC - Brasil.
VOLTAR
Copyright ©2026 - Web Design - Naise Minas
|


